Pages

Showing posts with label decorating. Show all posts

Tuesday, March 8, 2011

Me + This Desk = Awesomeness

I have been drooling over this desk for sometime now...


So beautiful.  So lovely.  And so perfect when I imagine it in our office.


The only mountain in the middle of the road is the $599 I would have to fork out to own this gorgeous desk.  OUCH.

So here I am, left with a few choices in this journey of taking this desk from dream to reality:

1. Find a look-a-like desk...I've found a few country-style kitchen tables that match up somewhat closely.

2. Search endlessly on Craigslist and Ebay until I find it second-hand.

3. Save up the $599 and just buy the dang thing.

What to do..What to do..What to do?

Saturday, January 22, 2011

Bedroom Lighting

One thing that I've never understood about our house is that many of the rooms do not have ceiling lights.  Ceiling fans, maybe...but not ceiling lights! Really?  Can someone explain this to me?

Apparently, this is common in new construction and helps keep down the initial costs for the developer (we bought the home as is, so we didn't choose any of the upgrades).

So for 2-1/2 years, we've lived with the light of one lamp in our master bedroom.  I don't know why it always takes me FOR-EVER to get around to these things...

Finally, we made a stop at Bed, Bath, & Beyond and bought a set of 3 lamps to kick off the process of a master bedroom redo (remember my New Year's resolution?).

{Before} - Here's the lone lamp...


I love natural daylighting, so I wanted that same effect even when it was dark outside.  We picked the daylight bulbs, which is more of a "blue" light on the light spectrum.  These bulbs also make your white lamp shades look more white.


Here is a picture showing the contrast of the two different light bulbs.  The bedside lamp in the foreground is using the more yellow toned compact fluorescents and the two lamps in the background are using the new daylight bulbs.  Soooooo much better, in my opinion.


{After} - I finally have my own lamp on my side of the bed! 


{After} - Lamp #3...the lighting in our bedroom has tripled!


Next project in bedroom...new bedding!

Friday, December 31, 2010

Here I Stand, Resolute

Here are five of my 2011 resolutions...may God help me in these endeavors (or at least help me make it past the month of January!)...

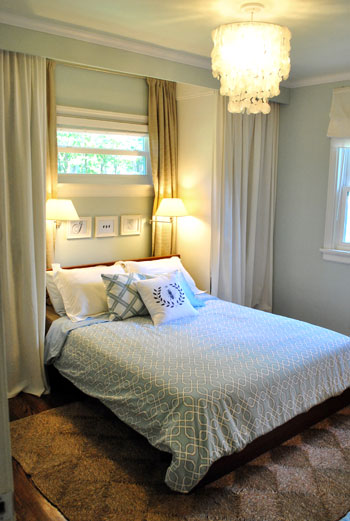
1. Update our bedroom. You can't see it in the black and white picture (on purpose), but our walls are a shade of green that I'm becoming more and more uncomfortable with each day.  I'd like to paint the walls and bring in some decor that channels relaxation, comfort, and natural airiness.  


Inspiration...

Young House Love, Master Bedroom

 2. Take more walks.  


3. Tame the pile-o-dishes before I hit the sack each night.


4. Make our bed each morning.  


5. Finish a book! I'm excellent at starting them (really, a pro), but horrible at finishing them.  I'm resolving to not pick up a second book until I've finished the first one.


Need help deciding what your resolutions should be? Click here for a New Year's Resolution Generator.  

May God bless you in 2011!  


Friday, December 17, 2010

TGIFriday Feature: Modern Country Style

Hi there! Thanks for stopping by. Two posts within 24 hours! This is a record, for sure. If you missed the last one, check it out here.

Well, each Friday (disclaimer: or as often as I can), I'd like to feature some of my favorite blogs out there...and maybe....just maybe, you might like them too. :)

I'm not getting paid to do this or anything...it's just me sharing with you some of the wonderfulness I've discovered in "blog-land".

And the inaugural feature goes to....

Sarah @

Enter the site here.

I love her decorating style...her home seems like a place where you would be instantly comfortable.  Here are a few of her projects that I've been admiring (okay...envying). :)


Bathroom Redo - I love that tile! It looks like something you'd find at a spa.


Kitchen Redo - How adorable is that jar display?!?


Bedroom Redo - Beautiful!...and she totally made that pillow.


Don't you just LOVE that nightstand?!?


She's also pretty crafty, too.  These scrabble magnets are a great idea.  When I saw this, I knew I was going to have to try this project.  I don't have any vintage scrabble pieces, but I do have some lying around that I've used for scrapbooking. (Project coming soon!)

Well, now that you've seen a few of my faves from Modern Country Style, I do hope you'll venture on over to the site and see for yourselves. ;)  I'm sure she would love to have you! 


Wednesday, December 1, 2010

Ode to a Rainy Day

It's a weekday and I'm totally not at work! Wahoo!!! But I will be later this evening. : (

What a great day to be home though! It's totally yucky outside and I'm all cozy in my warm house...until my little dog, Ginger beckons me to take her outside.

There's a spot in our master bedroom that I especially love on rainy days like today...


As you can see, Ginger is a fan of this spot as well. :)


Guard dog.


Where do you feel cozy on a cold, rainy day?


Monday, November 29, 2010

Spice Cabinet Makeover

Remember how I said I wanted my spice cabinet to look like this...


Well, now it really does! So similar, in fact, it's almost creepy. :)

Here's the after shot...


Here's the before shot...


Let me show you how to get this look (the "after", not the "before")...

Martha Stewart offers these fabulous labels for free on her website.  Get them here.


You can attach the labels one of two ways:

1. Print out the labels on regular printer paper, cut them out, and apply an adhesive to the back of them.  I used a scrapbooking adhesive.  See below.

2. Print them out on adhesive-backed paper that can be found at an office supply store.  Then, cut them out.


The spice jars came from IKEA. A 4 pack was only $2.99! What a steal!


Apply labels to jars.


While I was in Philly this past weekend, I went shopping at the coolest spice store in the Italian Market area called The Spice Corner.  This is hands-down the cheapest way to buy spices! They have every spice/herb you could think of and more.  I stocked up for the year and still have a ton of spices leftover. 

Street View of The Spice Corner, Google Maps

 Here's my loot...


And here's my updated spice cabinet...


Sunday, November 21, 2010

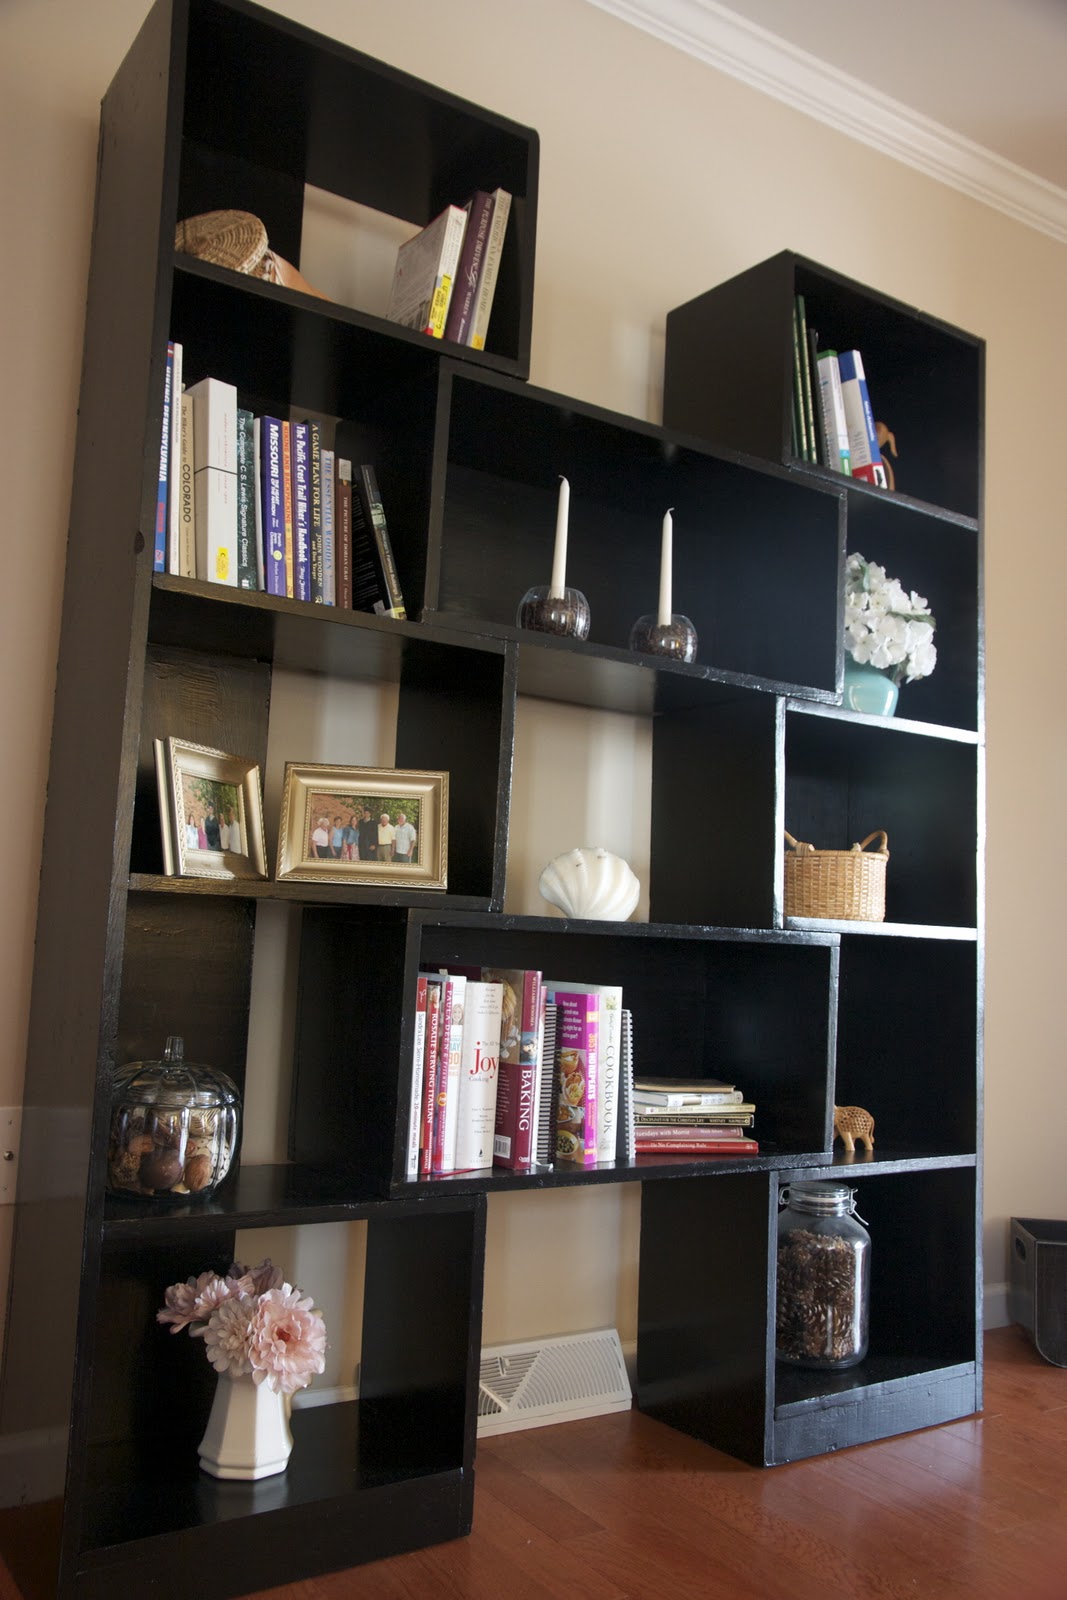
Knock-off Crate and Barrel Bookcase - Done!

Here's the rest of the journey...

My theory on painting: there's a reason why they put the word "pain" in "painting". 

The painting of the bookcase commenced a while back with a trip to Lowes, a coat of primer, and almost as much paint ending up on me as did on the bookcase itself.  While I'm nowhere near qualified to be giving painting advice, I did learn a few things in the process from some people who are.

So, if you recall, this is the bookcase I am working with...


I started out with bare wood and wanted to paint it black to look like this one from Crate and Barrel...


With the guidance of a helpful Lowes associate, I bought a can each of oil-based primer and glossy black paint.  She recommended oil-based primer because bare wood will tend to absorb more, requiring more coats if you go with the typical all-purpose primer (no, thank you!..my goal is to do as little painting as possible).

I also needed to buy a brush meant for oil-based paints, a plastic sheet so I didn't paint my garage floor, and some paint thinner.

Warning: Have plenty of air flow in the space where you are working!  The fumes can get pretty strong.  I opened the garage door while I was painting.


With all the gusto of starting a new project, I applied a coat of the oil-based primer to the bookcase.  Hint: If you are painting with a dark color (i.e. black), have them tint the primer.  They will add a bit of black to the white primer so that it doesn't require so many coats to overcome the stark white color.


Then, I applied the first coat of paint, careful not to leave an puddles of paint (this can easily happen at the corners or edges) along the way.

Clean up:


The paint thinner is for cleaning the oil-based paint off of the brushes or other tools you might be using.  However, it's really important that you learn the correct way to use and dispose of paint thinner before using it.  Here is an article with some safety tips regarding paint thinner.

How to get oil-based primer/paint off your hands/skin? I have found that using a cooking oil to get it off works pretty well. 


 I ended up applying two coats of paint.  By that time, I was starting to wonder if a paint roller might have been a better choice.


Then, I cut and applied these felt-like pieces to the bottom of the bookcase.  I have a hardwood floor, so these guys are definitely a requirement!  And I liked the fact that they came in sheets so I could cut them to the desired size and shape.  Perfect!

And roll out the red carpet! Here she is!


Now, for decorating the bookcase, I just raided other rooms in my house for things that could work.  But I am definitely going to be doing some changing to the decor on this bookcase.  Here's some looks I'm loving right now...

I love the baskets and all the earthy colors in this Pottery Barn bookcase.

Pottery Barn


Throwing in some grass and books of like colors creates a really clean effect that I'm adoring.

Southern Living

I also like the mixture of different trinkets (which I could totally find at yard sales!), black and white photos, and neutral-colored books.

Martha Stewart

Then, of course, I like the modern decor on the original Crate & Barrel version.


Well, I'll get around to the decorating.  Right now, I'm just so happy to have this project done and displayed in our home! Thanks to Ana-white.com for providing me with plans that even I could follow!   Visit her site to make your own piece of knock-off furniture!


Want the plans for this bookcase?  Here is the direct link to the Knock-Off Crate & Barrel Bookcase on Ana-White.com.


LinkWithin

Related Posts Plugin for WordPress, Blogger...